Sunday, November 30, 2014

Pro-Tip #21: Winter Photography

First Snow, White Mountains - © Greg Clure

This year in my Pro-Tip section I am writing about ways to get creative so your images will standout from the other 880 billion photos that are expected to be taken in 2014. For many reasons, winter is a great time to get outdoors and capture some unique images. Here's what makes winter special and some tips to ensure your winter images come out perfect.

For the following reasons winter is a great time for nature photography:
  1. The sun is at its lowest angle to the earth's surface which offers extended golden hour shooting time. Depending on your latitude the golden hour can be the golden two or three hours.
  2. Clean and fresh, snow can cover up what might be a dull unflattering scene and turn it into a clean and fresh winter wonderland.
  3. Fewer people and photographers are out and about when the weather outside is frightful. This means you'll have few if any unwanted people in your compositions and you'll likely be competing with fewer fellow photographers for the best vantage points.
  4. Hi-key images, those scenes that predominately feature highlight tones, are a natural when everything is covered in white.
  5. Lodging rates are generally lower in the winter season than the height of summer vacation rush when many locations see the majority of their visitors. Also booking a place can be much easier and last minute which can help time your visit right after a fresh dumping of new snow.
Here are a few tips to ensure you come home with great images:
  1. Exposure will be your biggest challenge. Your camera's meter will want to under expose your wintery images and turn your white snow grey.  So dial in a stop or two of overexposure to keep it looking white.
  2. Camera batteries drain much faster in cold weather so keep them warm in your pocket until you have your camera set up and your composition framed. I've had batteries stop working on me when shooting in the cold only to warm them again in my pocket which brought them back to life and allowed more shots to be taken.
  3. Moisture or lens fog can be an issue if you find yourself going in and out of the cold. Placing your lenses in Ziploc bags will prevent condensation in this scenario.
  4. Carry an emergency kit in your car: food, water, blankets, etc. that you hope you won't need to use but could save your life if you do need to use it.
  5. Dress in layers, in wool or synthetic materials, that will keep you warm and comfortable on your shoot. Being cold and miserable in not likely to be an enjoyable experience.
  6. Always, always, always check the weather forecast for the dates of your travel.
Common sense precautions will help you enjoy the winter scenery and wildlife in a unique white setting.  Expand your portfolio with winter scenes of new places or places you frequent.

Wednesday, November 26, 2014

Topaz Collection Black Friday/Cyber Monday Deal

On SALE Nov. 28 - Dec. 1, 2014 

Save 42% with code "BLACKFRIDAY2014" 

Reg. $429.99, NOW $249.99 


Friday, September 19, 2014

Introducing Topaz Labs Impression

https://dl.dropboxusercontent.com/content_link/0LeBAatJWpqcs2p5ZiAlbAZsQMsAv6y9fO7TPNK4uSSidiuygvygGqul8mM6ti5m

Now on SALE through the end of September 2014

Save 25% with code "SEPIMPRESSION"

Reg. $99.99, NOW $74.99

Photos allow you to see. Art allows you to feel.


Impressionism noun · an artistic style that seeks to capture a feeling or experience rather than to achieve accurate depiction

The old masters like Monet, Van Gogh, and Cezanne concerned themselves with feeling and emotion in their art. Even though they were absolutely capable of faithfully reproducing their subject like a photograph, they didn’t want to. No, they wanted to show the subject like they felt it, not as it objectively appeared. And that’s why it’s so easy to tell the difference between a Monet, Van Gogh, and a Cezanne - because they made their paintings a reflection of themselves.
"Real painters do not paint things as they are. They paint them as they feel."Van Gogh
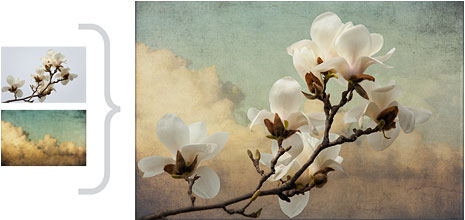
Impression helps make your photos more expressive by authentically turning them into art, the way a real artist would. Rigidly realistic photos sometimes leave less room for emotion, personal feeling, and story. Instead of just showing reality, take your viewers on a story by using Impression to capture emotion and feeling rather than details. This can make your work both more powerful and more personal.

Saturday, September 6, 2014


New Perfect Photo Suite 9
Your Photo. Your Look.

Save Big on Perfect Photo Suite 8.5 NOW

and

Get Suite 9 for FREE in October!

The new Perfect Photo Suite 9 Premium Edition is coming soon! Order today and you'll get all eight apps in Perfect Photo Suite 8.5 Premium Edition at a discount. When the new Suite 9 becomes available in late October, you'll get a free upgrade! You'll also receive 50 professional presets plus the new Suite 9 eBook for free.
Buy now and save $70.
Learn more
Limited Time Offer
Perfect Presets 9 Free Bonus
$50 value!
eBook

Suite 9 is Seven Powerful Products in One

Forget Preflight. Go QuickFlight.

Find and manage photos with lightning-fast previews.

New Smart Photos

Re-edit your photos—with previous settings intact—after saving and closing!

Enhance in Seconds

Fix color and make your photos bright and clear instantly.

Create Any Look with Perfect Effects 9

'The Silver Sunset Look'

Remove Distractions

Easily retouch and remove distractions with simple tools.

Beautify Portraits

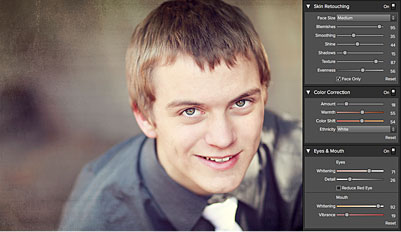
Smooth skin and brighten eyes and teeth with slider controls

Create Multi-layered Files without Photoshop

New Quick Mask Tool

Remove backgrounds automatically!

Updated Perfect Brush

The best masking tool available.
See all the features and tools in Suite 9 »

Save Big on Perfect Photo Suite 8.5 NOW

and

Get Suite 9 for FREE in October!

Learn more
Limited Time Offer
Perfect Presets 9 Free Bonus
$50 value!
eBook

Sunday, August 31, 2014

Pro-Tip #20: Waterfall Photography

The Whole Enchilada, Burney Falls -- © Greg Clure

This year in my Pro-Tip Section I am writing about ways to get creative so your images will standout from the other 880 billion photos that are expected to be taken in 2014. Waterfalls do present themselves as a wonderful and challenging subject matter to photographers. Firstly they’re beautiful places, secondly they are often in tricky lighting situations and thirdly they’re a dynamic subject as they’re moving (and of course movement means a challenge but also a real opportunity for a more dynamic shot).

Here are some tips to help you bring home some creative waterfall shots:
  1. Go during the best season - Since waterfalls require water, you'll want to go photograph them  when it is plentiful. That typically means spring or early summer when the flow is at its peak.  Some waterfalls dry up in drought years not to be seen again until the rains return. Spring also has the add benefit of spring wildflowers for your foreground.  There is one exception to the springtime rule and that is waterfalls fed by underground springs or other flows of water that do not run out.  These give you the best of every season from the wildflowers in the spring to lush greenery of ferns and trees in the summer to the turning color of fall leaves in autumn and right on into winter for ice cycles and frosty coatings.
  2. Shoot in soft even light - We often find waterfalls in deep canyons so taming the dynamic range of your location should be top-of-mind. Step cliffs and plunge pools surrounded by trees and heavy undergrowth will often be in dark shadow while the open plunge pool, waterfall and sky above may be brightly light. That's why overcast days are the perfect choice in which to shoot waterfalls as they provide the soft even light needed to produce a dynamic range our cameras a capable of recording. Short of finding an overcast day to shoot on, like most things shot in nature, the early morning or late afternoon golden hour can help with high dynamic range issues or by this time of day your subject waterfall could be thrown into complete shadow which has all the benefits of soft even light.
  3. Use a tripod for a more dynamic shot  - Anytime you’re presented with a moving subject a photographer really has two options. Firstly they can freeze the motion by using a fast shutter speed and secondly they can capture and enhance the motion by using a longer shutter speed that blurs the moving element in the shot (in this case – water). Most photographers take the second option and allow the water to blur. How much blur is up to you, but you don't want so much blur that it is void of detail so there is often a sweet spot that straddles the line between enough blur and freeze action. In all cases, the shutter speed required will be to slow for handle holding.
  4. Choose the right shutter speed - The right shutter speed is the one that looks best to you. But generally large fast moving volumes of water look good in the eighth to full second range while low volume flows that bounce off the rocks before reaching the plunge pool could require some much longer times. The great thing about digital cameras is they have a LCD screen which allows us to check our results and get into the approximate area (shutter speed-wise) where the water looks best.
  5. Bracket your shutter speeds - It can be hard to see the fine detail on your 3 inch LCD screen and what could look best on it may not look best on your 27" monitor at home. So give yourself some cushion and bracket by a couple of stops on each side of normal exposure with a few slower that optimal shots and a few faster than optimal shots.  This will give you a choice back home to make rather than tiring to do it in the field on your LCD. You will also be able to use one of the faster shutter speed shots to freeze the movement of plants and tree leaves that surround the water and blend it together with one of the slower shutter speeds for which the water looks best giving you the best of both worlds.
  6. Useful filters for waterfalls - I always carry these three filters with me to every shoot as they can help you get close to the final shot in camera. a) Circular Polarizer, this filter will be useful in reducing glare from shiny wet surfaces, deepen color contrast and dropping your exposure a stop or two for longer shutter speeds. b) Neutral Density (ND) Filters - these are are used to lengthen your exposure times when your camera is already set at its lowest ISO and smallest aperture the ND filter will allow you to go slower. c) The Graduated ND filter, this filter is used to reduce the dynamic range of a scene, for those waterfall shots where you want to include a portion of the sky this filter will help knock down the bright sky to a more manageable range.
  7. Shoot the details -In addition to the grand scenic overview shot we must all capture don't forget to shoot the details. Isolate a portion of the falls or smaller tributary next to the main falls. Do some close up work on interesting sections of the falls and shoot many different preservatives if possible, high overviews from above, mid-way down the falls and at plunge pool level, each will provide a different look and feel to the same subject.  You should also work your way around the falls shooting from both left and right sides as well as some choice spots in between.
  8. Cover your lens when not shooting - The larger the the waterfall the more problem you'll have with mist and wind as these gushers tend to create their own micro climate and can kick-up bands of heavy mist and wind in certain areas around the plunge pool so always cover the lens when you are not shooting and have a micro-fiber lens cloth handy to remove any droplets of water that do find there way onto the surface of your lens. You might also bring a jacket for yourself, even on a hot summer's day the temperatures next to waterfall can be 20 degrees cooler and down right chilli if you find yourself in the spray of the water and wind vortex as the sun drops below the ridge-line.
  9. Correct your white balance - More often than not the water in the waterfall will pick-up a blue cast from the blue sky overhead.  Hopefully you are shooting RAW and will be able to naturalize the white water in your waterfall to be white, not blue. There are many tools to help you accomplish this but the one I like to use is the white-balance eye-dropper tool found in most all editors that will remove the color cast with the single click of the mouse.
Use these tips the next time you find yourself in front of one of nature's most beautiful arrangements of falling water.  I shot a lot of waterfalls, and water in general is a favorite subject I often find myself capturing, you'll find a lot of examples at www.GregClurePhotography.com

Burney Falls Detail -- © Greg Clure
 

Sunday, August 10, 2014

Topaz Adjust 50% Off, July 13-31!


The Secret Sauce That Makes Photos Pop!

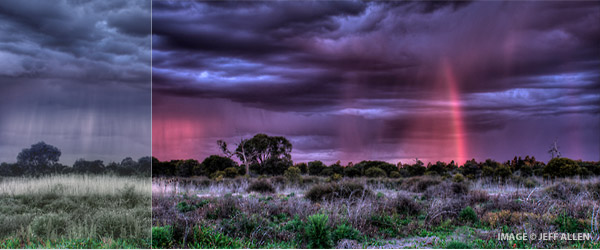
You can create stunning images with dramatic contrast, incredible detail and vibrant color with award-winning Adjust. Preset options range from subtle, realistic enhancements to artistic HDR-like presets. In just a few clicks, it's easy to produce a truly eye-catching look in a single image.

See more stunning examples on what this plug-in can do by following this link to the Topaz Labs Adjust Page where you can download a fully functional free 30-day trial package to give it a try on your images!

SALE, Save 50% July 13-31, 2014

Reg. $49.99, NOW $24.99 with code "augadjust"


Thursday, July 31, 2014

Pro-Tip #19: Creating Beautiful Sun Stars


Toroweap Sunset, North Rim Grand Canyon  | © Greg Clure

This year in my Pro-Tip section I am writing about ways to get creative so your images will standout from the other 880 billion photos that are expected to be taken in 2014. Most photographers avoid shooting directly into the sun as it creates unwanted flare and the harsh contrast doesn't often lead to a pleasing image.  The following tips should help you control flare the next time you find yourself looking to create that perfect sun star. But before we get to the tips it might be helpful to understand what's happening in the lens that creates the sun star or burst.

All but the simplest cameras contain lenses which are actually comprised of several "lens elements." Lens flare is caused by non-image forming light which does not pass (refract) directly along its intended path, but instead reflects internally on lens elements any number of times (back and forth) before finally reaching the digital sensor. Although flare is technically caused by internal reflections, this often requires very intense light sources in order to become significant (relative to refracted light). Flare-inducing light sources may include the sun, artificial lighting and even a full moon. Even if the photo itself contains no intense light sources, stray light may still enter the lens if it hits the front element. Ordinarily light which is outside the angle of view does not contribute to the final image, but if this light reflects it may travel an unintended path and reach the sensor. The star burst is caused by light passing through the aperture and being defracted (or spread out) across the aperture blades in the lens; and the less curved they are the crisper the star effect.

Now that we know the science, here are some tips to help you create the perfect sun star:
  1. Use a Small Aperture - While bigger apertures may flare the light the curve of the blades is more pronounced due to the larger opening causing a reduction in the crispness of the flare. Since small apertures have very short and straight edges they create sharper looking star bursts.
  2. Find a Hard Edge Obstruction -  Although you can get a nice star when shooting the the sun high in the sky, I find I get the best results when I obscure the majority of the direct light behind a hard edge object within my composition and only use the smallest slivers of light. This helps reduce the unwanted bad flare and leaves just the good flare, that is; the points of the star.
  3. Use a Bright Light Source and Dark Surround - Bright unfiltered light works best in creating sharp star bursts. If your light source is filtered by clouds, fog or haze the sun star that forms, if any, will tend to be muddy and lack clarity.  Also, you need a dark area surrounding your bright light on which to view the flared light. A good example is the Toroweap Sunset image above, the flared light is readily visible against the dark canyon walls but not so much against the bright sky.
  4. Use Live View and Depth of Field Preview - Once I have a well composed image, I like to view the sun star on the Live View screen. Additionally, if you are a Canon user than you can also use your depth of field preview button to stop down the lens to your intended aperture. At this point you can see the effect of a what a slight shift in camera position will have on the size and shape of your sun star.  You can see the effects of changing your aperture setting has on the star. You will be able to tune in the best looking flare for your composition.
  5. Different Lenses Create Different Results - High quality glass makes a difference here, generally speaking, the better the glass the more likely you will get sharper more clear sun stars. This is one area where gear really does make a difference so use your best lens.
  6. Eliminate Unwanted Flare - It can be a good idea to take an exposure with the sun completely blocked to be blended later in post production with your best star burst frame allowing you to eliminate the sometimes unwanted and unavoidable bad flare components that you can sometimes get when shooting directly into the sun.  You can do this by taking a shot before or after the sun pops into view or use your thumb or fingers to obscure the sun. All flare, including your star, will be be eliminated from from this frame. This will save you a lot of time and frustration in cloning and healing the bad flare out in post production.
  7. If All Else Fails, Use Topaz Star Effects - While it should be easy to get the star burst of your dreams with the tips above, sometime you may need to help things along. Topaz Labs make a plug-in call Star Effects and it can be a lifesaver in adding a star effect to any light source or perfecting or tweaking the one you did capture. Receive a 15% discount on any Topaz product by visiting my Topaz Labs discount page.
Keep these tips in mind the next time you are out shooting any bright light sources, like the sun, and you'll find creating beautiful sun stars to be a snap.
1) Small Apertures – generally speaking, you’ll have to use a small aperture, something like f16 or f22 to make fully-formed crisp sun stars.  Wider apertures like f2.8 or f5.6 simply don’t cut it on most lenses.  The starburst is caused by light passing through a small aperture and being diffracted (or spread out) across the aperture blades in the lens.  The more blades and the less curved they are the better the star.  Not all lenses are created equally, see #5 below.
2) Hard Edge Obstruction – Although you can make a nice star when shooting the sun high in the sky, I generally find I get the best results (i.e. small size with minimal flare) when I play peek-a-boo with the light source.  To do this I’ll position the camera so the sun (or other light source) is mostly obscured by some compositional element in my frame – something like a clean horizon, edge of a tree, rock outcrop or building.  I find that harder and/or smoother edges yield the best results. 
3) High Fidelity Light – In addition to obscuring the light source, I find it’s best to use what I call high-fidelity light, namely light that is pure and clean.  When the light is being filtered through high clouds, atmospheric haze or fog the resulting sunstars tend to be muddy and lack clarity.  I also like low-angle, warm light around sunrise and sunset for my sunstars.
4) Use Live View to Preview – Once I’ve settled on my composition and am ready to shoot I like to use Live View in conjunction with the depth of field preview button (sorry Nikon people) to preview how my sunstar will look as well as get a sense for how much flare is being produced.  You may be surprised to see how much a little shift in camera position (up/down, left/right) can change the size and shape of your sunstar, as well as how much resulting flare you’ve got in the frame.  You can also use this method when choosing your aperture as you’ll see exactly what the sunstar will look like.  You may not need to stop all the way down to f22 to get the desired effect.
5) Not all Lenses are Equal – Unfortunately this is one area where the gear really does make the difference.  Not all lenses make sunstars or handle flare equally.  Generally speaking, the higher quality “pro” level glass make better, more defined sunstars than “consumer” level lenses.  And even some pro level lenses simply make better sunstars than others.  For example, it’s widely known that the Canon EF 16-35 f2.8L II makes one of the best sunstars around, significantly better even than its own predecessor.  I’ve had other Canon L series lenses that cover the same range of focal lengths but don’t make very appealing sunstars.  Not that this is the sole reason to purchase a particular lens – but it may be a significant consideration for some.
Bonus – As a final tip, I recommend shooting an exposure with the light source completely blocked in order to get a frame with little to no flare.  You can do this by shooting a frame before the sun pops out or right after it disappears from view, or perhaps even by blocking it with your thumb or hand.  You can then use this frame to blend out offensive flare using layers and masks in Photoshop.  This can save you a lot of time cloning and healing in post.
- See more at: http://www.ianplant.com/blog/2014/04/03/5-secrets-to-killer-sunstars/#sthash.Qc024uhJ.dpuf
) Small Apertures – generally speaking, you’ll have to use a small aperture, something like f16 or f22 to make fully-formed crisp sun stars.  Wider apertures like f2.8 or f5.6 simply don’t cut it on most lenses.  The starburst is caused by light passing through a small aperture and being diffracted (or spread out) across the aperture blades in the lens.  The more blades and the less curved they are the better the star.  Not all lenses are created equally, see #5 below.
2) Hard Edge Obstruction – Although you can make a nice star when shooting the sun high in the sky, I generally find I get the best results (i.e. small size with minimal flare) when I play peek-a-boo with the light source.  To do this I’ll position the camera so the sun (or other light source) is mostly obscured by some compositional element in my frame – something like a clean horizon, edge of a tree, rock outcrop or building.  I find that harder and/or smoother edges yield the best results. 
3) High Fidelity Light – In addition to obscuring the light source, I find it’s best to use what I call high-fidelity light, namely light that is pure and clean.  When the light is being filtered through high clouds, atmospheric haze or fog the resulting sunstars tend to be muddy and lack clarity.  I also like low-angle, warm light around sunrise and sunset for my sunstars.
- See more at: http://www.ianplant.com/blog/2014/04/03/5-secrets-to-killer-sunstars/#sthash.Qc024uhJ.dpuf

5 Secrets to Killer Sunstars

Okay, I’ll admit it; I’m a sucker for elegantly crisp sunstars.  I may go so far as to say that I’m addicted to them; not in a shady, I’ll break into your house for prescription meds kind of way, but more like if it’s readily available I’m happy to imbibe sort of way.  I especially like using them in my landscapes to create an additional element of interest, particularly when the cloud gods are punishing me for previous transgressions and there’s nothing but blue sky overhead.  However, like all things fun and sinful, too much of a good thing is still too much (except of course tequila, just ask George) so you should be careful not to overdo them or use them in excess for fear your portfolio will start to look a little gimmicky.
Before I risk offending anyone else with my slightly off-color attempts at humor, here are my 5 tips for creating killer sunstars in your images.
1) Small Apertures – generally speaking, you’ll have to use a small aperture, something like f16 or f22 to make fully-formed crisp sun stars.  Wider apertures like f2.8 or f5.6 simply don’t cut it on most lenses.  The starburst is caused by light passing through a small aperture and being diffracted (or spread out) across the aperture blades in the lens.  The more blades and the less curved they are the better the star.  Not all lenses are created equally, see #5 below.
2) Hard Edge Obstruction – Although you can make a nice star when shooting the sun high in the sky, I generally find I get the best results (i.e. small size with minimal flare) when I play peek-a-boo with the light source.  To do this I’ll position the camera so the sun (or other light source) is mostly obscured by some compositional element in my frame – something like a clean horizon, edge of a tree, rock outcrop or building.  I find that harder and/or smoother edges yield the best results. 
3) High Fidelity Light – In addition to obscuring the light source, I find it’s best to use what I call high-fidelity light, namely light that is pure and clean.  When the light is being filtered through high clouds, atmospheric haze or fog the resulting sunstars tend to be muddy and lack clarity.  I also like low-angle, warm light around sunrise and sunset for my sunstars.
4) Use Live View to Preview – Once I’ve settled on my composition and am ready to shoot I like to use Live View in conjunction with the depth of field preview button (sorry Nikon people) to preview how my sunstar will look as well as get a sense for how much flare is being produced.  You may be surprised to see how much a little shift in camera position (up/down, left/right) can change the size and shape of your sunstar, as well as how much resulting flare you’ve got in the frame.  You can also use this method when choosing your aperture as you’ll see exactly what the sunstar will look like.  You may not need to stop all the way down to f22 to get the desired effect.
5) Not all Lenses are Equal – Unfortunately this is one area where the gear really does make the difference.  Not all lenses make sunstars or handle flare equally.  Generally speaking, the higher quality “pro” level glass make better, more defined sunstars than “consumer” level lenses.  And even some pro level lenses simply make better sunstars than others.  For example, it’s widely known that the Canon EF 16-35 f2.8L II makes one of the best sunstars around, significantly better even than its own predecessor.  I’ve had other Canon L series lenses that cover the same range of focal lengths but don’t make very appealing sunstars.  Not that this is the sole reason to purchase a particular lens – but it may be a significant consideration for some.
Bonus – As a final tip, I recommend shooting an exposure with the light source completely blocked in order to get a frame with little to no flare.  You can do this by shooting a frame before the sun pops out or right after it disappears from view, or perhaps even by blocking it with your thumb or hand.  You can then use this frame to blend out offensive flare using layers and masks in Photoshop.  This can save you a lot of time cloning and healing in post.
- See more at: http://www.ianplant.com/blog/2014/04/03/5-secrets-to-killer-sunstars/#sthash.Qc024uhJ.dpuf

Monday, July 14, 2014

Topaz ReMask Now 50% Off


Mask like a pro, Effortlessly Create Photoshop Cut-Outs

Gone are the days of spending hours meticulously creating and refining your masks in Photoshop because Topaz ReMask can to the job in minutes. That's because ReMask is designed on one simple idea: You create the best quality mask with minimal input. By using ReMask’s intelligent technology, you have the power to quickly and easily extract even the toughest elements — hair, foliage, and transparent materials — in your photos.

See more stunning examples on what this plug-in can do by following this link to the Topaz Labs ReMask Page where you can download a fully functional free 30-day trial package to give it a try on your images!

SALE, Save 50% July 15-31, 2014

Reg. $69.99, NOW $34.99 with code "julyremask"

Monday, June 30, 2014

Pro-Tip #18: Selecting a Photo Workshop

Santa Monica Mountains High Tide & Sea Stacks Workshop, © Greg Clure
 Just because a photographer can take awesome photos does not mean he/she will be an awesome instructor. What the photos do tell you is the kinds of subjects you'll be shooting and the style in which they are captured.  So if you like the style and subject matter of a particular workshop photographer than you will likely be happy with your workshop leader.  Hopefully, this leader has had some formal photography education in the past and is not one of the many self-taught gurus just gunning for your wallet.  Easy enough to check into, if this information is not already prominent on their website, then simply ask them about their credentials. Those with formal photography educations are more likely to be more knowledgeable  instructors and can draw upon that knowledge at any moment during your workshop to solve issues that are sure to come up during most any photo shoot.

Consider the workshop format, typically there are three major types here, 1) Image capture centric, 2) Post-processing centric, and; 3) A combination of both.  If you have assessed your own objectives for taking a workshop than this is generally a straight forward decision.  If you are traveling to a far away location than most likely a image capture centric workshop is best because you could likely find a local post-processing workshop near your home, or purchase classes from one of the many on-line education services such as CreativeLive, KelbyOne, or Lynda.com.  Why travel to a far away exotic location to sit in a classroom? Combination workshops are also a good local option if you are looking for help from capture to print, but again; why travel to an exotic location to spend time in a classroom, find one locally and save some money.

How much physical effort will be required? Some workshop may require considerable hiking to shoot locations while others may only require short walks from the parking lot. If you do take a workshop that requires hiking than you should find out the distances involved and determine if that is something you are capable of doing or at least do a little training at home prior to the workshop so you are in-shape for the workshop hikes. You'll enjoy the hikes a lot more if you're prepared and in shape and not struggling to keep up with the pace of the group. Another consideration is the shoot schedule, shooting from before sunrise to well after sunset requires a different physical stamina than one that may fore-go a sunrise shoot or have scheduled breaks.

While every workshop will be different, even those lead by the same instructor, you should expect to learn a few things you didn't know before the workshop even if your objective is just to be in a location at the right time and place, with the right light to increase your odds of capturing stunning images.  While no instructor can control the quality of light provided by mother nature, he/she should know the best times and locations for the area to increase your odds of success. The best workshops time their arrival at the most opportune part of the calendar to coincide with the show mother nature is putting on, for example; spring wildflowers or fall color.  Stay away for ill-timed workshops, for example; a desert workshop in August, the 100+ degree temperatures will not make for an ideal environment for you or your subject matter.  Another example may be a summer workshop in Yosemite, while it may seem an ideal time, this is the time of the year the park receives the bulk of its 6 million annual visitors not to mention many of the waterfalls could have low water flow or even be dried up.

Workshop vary in length and cost and if you are wondering if the $4000 invested in a 10-day sojourn through the American Southwest or $5000 trip to Iceland or $8000 African Safari will be worth the investment you should probably take a shorter trip with the same instructor/workshop company. Chances are if you receive good value for your dollar on a short workshop you'll likely receive a similar value for the longer trips they offer. Some large tour outfitters who employ many workshop leaders may make this impossible, so you are likely better off sticking to a smaller operator with just a one or two workshop leaders. Does the price include lodging, transportation and meals? Most will not include transportation/airfare to and from the workshop location, some or all meals and any souvenirs or incidentals along the way. Don't forget to include those costs into your value assessment.  If the workshop includes lodging, is the style of accommodations they've chosen up to your standards.  In my experience, lodging tastes and budget vary widely, while some prefer to camp in their RVs others want 5-star accommodations or something in between. It may be convenient to have the workshop company select your accommodations but the trade-off may be a room that does not meet your budget and/or expectation.  If that's the case, choose a workshop where you are not obligated to a particular facility but can choose from a number of nearby accommodations.

Finally, does the planned itinerary have a high shoot to travel time ratio.  After all, you are there to capture amazing images and the bulk of your time should be spent shooting pictures not traveling vast distances.  Look for workshops specializing in areas where travel from one shoot location to next is minimal, you also may not want to get up at 3AM to be at your sunrise shoot because of the travel time required or get back after midnight from your sunset shoot leaving you less than a full nights rest. While it is nice to know where you'll be going and what you'll be shooting from day to day you should not be locked-in to a set itinerary, your workshop itinerary should be flexible enough to be rearranged by your instructor to best take advantage of the light and prevailing weather conditions.  Like the rule of thirds, its a good guideline to follow but strict adherence may not always produce the best composition.  You need to recognize when to break this rule to get a better image just like any workshop leader needs to know the better location to take you for the prevailing conditions even if it means not following the itinerary.

The common goal of any workshop attendee is to come home with stunning images, that's a given, but understanding why you got them could be more valuable and can be applied to future outings when there is no instructor. Transferring your workshop leanings to future shoots will be the proof of the value of the photography eduction you received at your workshop. You can direct a persons camera to the perfect composition and have them snap the shutter or you can teach the person what makes up a well composed image so they can find a beautiful photo where ever they may be shooting. Hopefully, you are a better photographer after the workshop and can see the results in your images taken well after the workshop has ended.

I offer a limited number of workshops in the Southern California area and I have recently announced my 2015 workshops dates, get all the details by clicking HERE!

Wednesday, June 18, 2014

OnOne Perfect Photo Suite 8.5 Special Offer


Suite Summer Bundle

Get all 8 powerful apps included in Perfect Photo Suite 8.5! It's a complete photo editor with everything you need to create your best images. Purchase by June 26th and you'll receive the entire Suite Summer Bundle with 3 free bonus products! Explore Perfect Photo Suite 8.5 »

Perfect Photo Suite 8.5*

8 powerful apps in one photo editor! This Edition works as a standalone application and as a plug-in to Adobe Lightroom, Photoshop Elements, and Apple Aperture. 
$129.95

CreativeLive Workshop Collection

Over 5 hours of online training workshops on Adobe Photoshop and Lightroom, produced by CreativeLive and the best Adobe instructors on the planet.
$116.00

Endless Summer Preset Pack

Give your summer photos a unique look with these 32 summer-stylized presets created by top pros. Includes 8 presets for Perfect Effects, 8 for Lightroom, 8 for Adobe Camera Raw, and 8 for Apple Aperture.
$40.00

eBook: Light & Process by Nicole S. Young

A 205-page beautifully illustrated collection of 10 step-by-step photography and post-processing tutorials on Suite 8.
$10.00

Total value of Summer Bundle$295.95


Only $99.95* You Save $196.00

 Learn More or Buy Now...

Offer ends June 26, 2044
Upgrade for $69.95

For other plug-in package discounts visit my software discount page or to see examples of photos that utilize plug-in editors visit my gallery, www.gregclurephotography.com


Friday, May 30, 2014

Pro-Tip #17: Luminosity Masks via Easy Panel


Rainbow Sky, Created Using Luminosity Masks - © Greg Clure

This year in my Pro-Tip section I am writing about ways to get creative so your images will standout from the other 880 billion photos that are expected to be taken in 2014. Luminosity masks are one such tool you can use in your post-processing workflow to gain greater control over the tones in any image. So, what are luminosity masks? Luminosity masks are nothing more than selections based on the brightness values of the image. These masks provide a convenient way to select a specific tone or range of tones in an image which can then be manipulated as you see fit.  They are useful when global adjustment can't get the job done or when you want to blend different exposures together in order to achieve a more realistic result than HDR programs are capable of achieving. Making your own luminosity masks can be tedious and time consuming and is why I use the Easy Panel. The Easy Panel is a free online tool that when installed to your Photoshop CS program will create 18 luminosity masks with the click of a single button as well as other cool features.  It doesn't get much easier than that! You can read all about the Easy Panel and download a free copy of this tool at  www.shutterevolve.com/easy-panel-photoshop/ and start your journey to more sophisticated image editing and move your photo processing results up to the next level.
Wednesday, May 14, 2014


On Sale Now

Get All 8 Products in 1 Powerful Editor

http://www.onOnesoftware.com/affiliates/idevaffiliate.php?id=397
Tell me more
The New Perfect Photo Suite 8.5 is here and it's never been this easy and fun to enhance and finish your photos. Get all 8 products in the Suite now, at a special discount, and receive 80 free bonus presets and textures!
Learn more »
Quickly create a unique look with hundreds of photo effects
and filters in the new Perfect Effects 8.5.

Remove distractions in seconds with brush strokes.

Combine multiple images and create multi-layered .psd files in Perfect Layers.

Adjust color, contrast, and white balance quickly with Perfect Enhance 8.5.


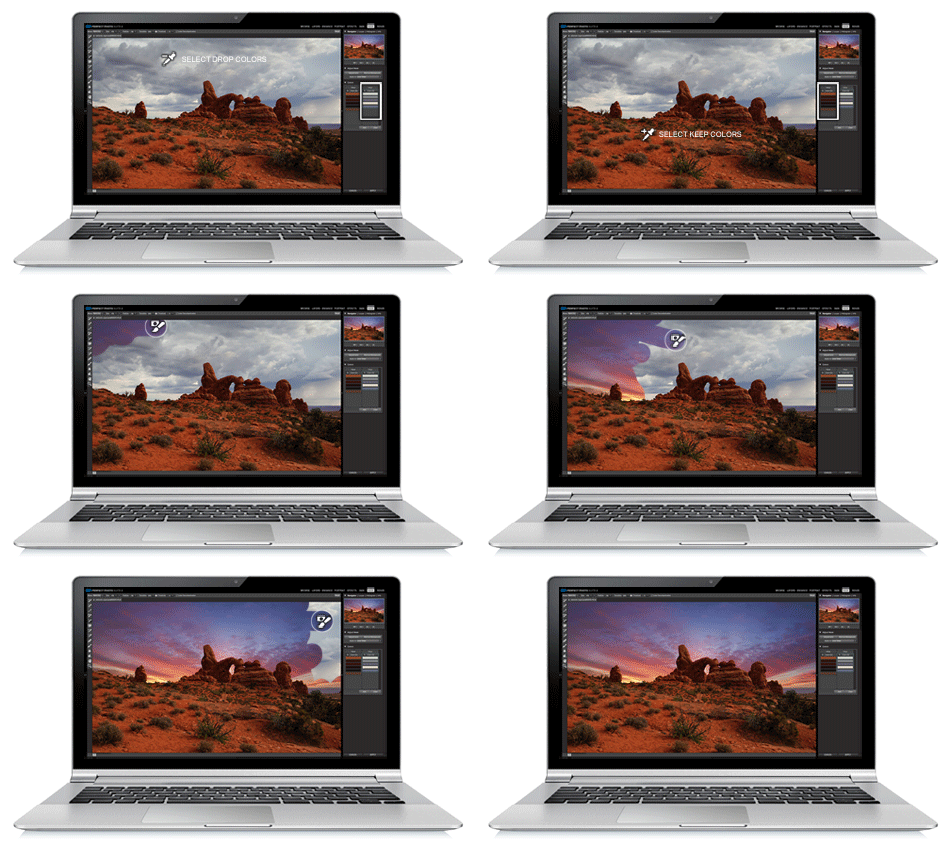
Remove backgrounds in minutes using simple tools in Perfect Mask.


Correct skin color and fix portraits in Perfect Portrait.

Create high-quality enlargements from low-resolution images,
and crop and resize in one simple step in Perfect Resize.