This is part four of my elements of exposure series.
The shutter is the curtain in front of the recording medium. The shutter speed is the amount of time the curtain in front of the recording medium is left open to the light. The shutter speed is expressed in seconds or fractions of a second. The typical DSLR has many shutter speeds and will typically include those diagramed below.
1/2000•1/1000•1/500•1/250•1/125•1/60•1/30•1/15•1/8•¼•½•1•2•4•8•15•30
<------------- Fast ---------------------- Moderate -------------------- Slow -------------->
In addition to these standard settings there is typically a Bulb setting that allows for an infinite amount of time for an exposure as decided by the photographer. In the standard shutter speeds illustrated above as we move from left to right we are doubling the amount of light for each successive speed or we are increasing exposure by one stop. Conversely, as we move from right to left we are cutting in half the amount of light or reducing exposure by one stop for each successive move in that direction. Shutter speed controls our ability to freeze action or reduce motion blur associated with a moving subject or blur as a result of camera movement or camera shake. A photographer would employ a fast shutter speed if he/she wishes to freeze action and/or reduce motion blur associated with camera shake. On the other hand, if a photographer wants to accentuate motion blur he/she would employ a slow shutter speed. The ability of the photographer to take images without noticeable blurring by camera movement is an important parameter in the choice of slowest possible shutter speed for a handheld camera. The rough guide used by most 35 mm photographers is that the slowest shutter speed that can be used easily without much blur due to camera shake is the shutter speed numerically closest to the lens focal length. For example, for handheld use of a 35 mm camera with a 50 mm normal lens, the closest shutter speed is 1/60 second. For a wider angle lens of 28 mm the shutter speed would be 1/30 second and for a telephoto lens of 200 mm the shutter speed would be 1/200 second. This rule can be augmented with knowledge of the intended application for the photograph, an image intended for significant enlargement and close-up viewing would require faster shutter speeds to avoid obvious blur. Through practice and special techniques such as bracing the camera, arms, or body to minimize camera movement longer shutter speeds can be used without blur. If a shutter speed is too slow for hand holding, a camera support, usually a tripod must be used. Image stabilization can often permit the use of shutter speeds 3–4 stops slower (exposures 8–16 times longer). The shutter speed compromise is deciding how much we wish to reduce motion blur of a subject or blur associated with camera shake versus our intention to artistically blur the action or increase camera blur to accentuate the feeling of motion in a scene. But, slower shutter speed, those typically longer than a couple of second, can introduce noise as well. Generally this is not a big issue due to most modern digital cameras ability to employ a noise reduction algorithm to counteract long exposure noise. However, longer exposures will have more noise than moderate or fast exposures.
Next we will take a look at dynamic range and what we can do when the dynamic range of a scene exceeds the camera's ability to capture it.

Tuesday, July 26, 2011

Tuesday, July 5, 2011
Elements of Exposure - Part III - Aperture
This is the third part of my Elements of Exposure series, be sure to read the first two parts before reading this entry.
Aperture
![]() As stated earlier, aperture refers to the size of the opening in the lens. In this diagram of seven aperture settings the opening at f2 lets in twice the amount of light as the next size smaller at f2.8 or one stop more light is transmitted to the recording medium. Conversely, f2.8 reduces the amount of light reaching the recording medium by half when compared to the next stop down of f2. This opening affects the depth of field or the amount of the scene that is in sharp focus from near to far. Smaller apertures circles (larger f numbers) render the greatest depth of field while larger apertures circles (small f numbers) limit the depth of field. This fundamental holds true for any lens but varies widely by the focal length of the lens. The depth of field at any given f-number will always be greater with wider angle lenses and will always be shallower with longer telephoto lenses. Depth of field is also greatly affected by the distance the lens is from the subject. The closer the subject is to the lens the shallower the depth of field will be at any given aperture. So the primary reason to change our aperture is to change our depth of field. With lenses however, both the smallest and largest aperture of any given lens due to various aberrations and/or limitations of producing a lens causes a reduction in the quality of our images at the aperture extremes while the sharpest and best quality images are typically rendered from the middle aperture settings. In the above diagram that shows a lens with aperture settings from f2 - f16, the middle aperture of f5.6 is likely to produce the sharpest quality image. So the photographer’s compromise is one of effect verses sharpness that affects the overall quality of our images. If a greater depth of field is desired than most photographer’s will not hesitate to use a smaller than optimal aperture to gain more depth of field to render a more three dimensional image by contrasting the near to far relationship of the elements of a scene that are all in focus. Conversely, if you wish to isolate your subject in a scene than most photographer’s will not hesitate to stop down to a larger than optimal aperture to limit the depth of field to a small slice of focus that concentrates the eye on their subject by throwing the other parts of the scene out of focus. This out of focus area is often referred to as a lens’ “bokeh.” A Japanese word used to describe the aesthetic quality of the blur in out-of-focus areas of an image, or the way the lens renders out-of-focus points of light. Differences in lens aberrations and aperture shape cause some lens designs to blur the image in a way that is pleasing to the eye, while others produce blurring that is unpleasant or distracting. In either case the photographer has decided that the effect needed for a particular scene is greater than the need to have the sharpest quality image rendered by one of the middle aperture values.
As stated earlier, aperture refers to the size of the opening in the lens. In this diagram of seven aperture settings the opening at f2 lets in twice the amount of light as the next size smaller at f2.8 or one stop more light is transmitted to the recording medium. Conversely, f2.8 reduces the amount of light reaching the recording medium by half when compared to the next stop down of f2. This opening affects the depth of field or the amount of the scene that is in sharp focus from near to far. Smaller apertures circles (larger f numbers) render the greatest depth of field while larger apertures circles (small f numbers) limit the depth of field. This fundamental holds true for any lens but varies widely by the focal length of the lens. The depth of field at any given f-number will always be greater with wider angle lenses and will always be shallower with longer telephoto lenses. Depth of field is also greatly affected by the distance the lens is from the subject. The closer the subject is to the lens the shallower the depth of field will be at any given aperture. So the primary reason to change our aperture is to change our depth of field. With lenses however, both the smallest and largest aperture of any given lens due to various aberrations and/or limitations of producing a lens causes a reduction in the quality of our images at the aperture extremes while the sharpest and best quality images are typically rendered from the middle aperture settings. In the above diagram that shows a lens with aperture settings from f2 - f16, the middle aperture of f5.6 is likely to produce the sharpest quality image. So the photographer’s compromise is one of effect verses sharpness that affects the overall quality of our images. If a greater depth of field is desired than most photographer’s will not hesitate to use a smaller than optimal aperture to gain more depth of field to render a more three dimensional image by contrasting the near to far relationship of the elements of a scene that are all in focus. Conversely, if you wish to isolate your subject in a scene than most photographer’s will not hesitate to stop down to a larger than optimal aperture to limit the depth of field to a small slice of focus that concentrates the eye on their subject by throwing the other parts of the scene out of focus. This out of focus area is often referred to as a lens’ “bokeh.” A Japanese word used to describe the aesthetic quality of the blur in out-of-focus areas of an image, or the way the lens renders out-of-focus points of light. Differences in lens aberrations and aperture shape cause some lens designs to blur the image in a way that is pleasing to the eye, while others produce blurring that is unpleasant or distracting. In either case the photographer has decided that the effect needed for a particular scene is greater than the need to have the sharpest quality image rendered by one of the middle aperture values.
In my next entry I will discuss the Shutter, the final compent of the exposure triangle. I want to hear from you, please leave your comments, questions or topic suggestion for future blogs in the comments section.
Aperture

In my next entry I will discuss the Shutter, the final compent of the exposure triangle. I want to hear from you, please leave your comments, questions or topic suggestion for future blogs in the comments section.
Wednesday, June 29, 2011
Elements of Exposure - Part II - ISO
In Part I of my Elements of Exposure series posted on June 16, 2011, I introduced you to the exposure triangle. The first component of the exposure triangle is ISO. Here I discuss what ISO is for and the advantages and disadvantages of different ISO settings.
Exposure Controls
Photography is always about compromise when it comes to adjusting our exposure controls to get a proper exposure. Let’s look at each adjustment individually and what the advantages and disadvantages are of changing each of these controls.
ISO
Originally from the film world, ISO is an acronym for International Standards Organization; this organization set the standards of film sensitivity so that it was the same from one manufacture to another. So a roll of ISO 100 film from Kodak, Ilford, Fuji, etc. would have the exact same sensitivity. In the film days our ISO was set for the entire roll of film loaded in our camera and the only way to adjust it would be to replace it with a different roll of film with a different ISO rating. Digital has changed that by allowing the photographer to change the ISO at any time. The problem with increasing ISO settings is that higher ISOs introduce noise into our images that reduces the overall quality of the image. Lower ISOs while delivering less noise and higher quality images may prevent us from capturing an image in the way we want to because there may not be enough light captured to give us a proper exposure. What is noise? In film and in digital photography, noise appears as graininess due to the capture of a different exposure or color in grains or pixels as opposed to the surrounding grains or pixels making it standout. As we increase our ISO it increases the occurrences of noise. As photographers we must find a balance between quality and noise that conveys the scene as we desire. As a general rule, we should always aim to use the lowest possible ISO if we want the highest possible quality. As a standard, this is generally around ISO 100. While there are films and digital sensors with lower ISO settings the quality of the images is not significantly better to warrant going much lower than this standard. The main reason for going lower than the standard would be because you desire to use a slower shutter speed or wider aperture than the standard allows. And, the obvious reason for increasing your ISO above this standard would be that it does not let in enough light to get a proper exposure at the shutter and aperture setting you desire to use. If we relate ISO to stops than a 100 ISO setting is half as sensitive as a 200 ISO setting or we could say a 200 ISO setting is twice as sensitive as a 100 ISO setting. If we move from 100 to 200 ISO we have doubled the amount of light being recorded or increased exposure by one stop. Or, if we move from 100 to 400 ISO we have increase exposure by 2 stops, and so on. Conversely, if we move from 400 ISO to 100 ISO we have decreased the exposure by 2 stops. In photography, stops are the common language of describing the intensity of exposure adjustments.
In my next post I will discuss the second exposure control, aperture. I want to hear from you, please leave your comments, questions or topic suggestion for future blogs in the comments section.
Exposure Controls
Photography is always about compromise when it comes to adjusting our exposure controls to get a proper exposure. Let’s look at each adjustment individually and what the advantages and disadvantages are of changing each of these controls.
ISO
Originally from the film world, ISO is an acronym for International Standards Organization; this organization set the standards of film sensitivity so that it was the same from one manufacture to another. So a roll of ISO 100 film from Kodak, Ilford, Fuji, etc. would have the exact same sensitivity. In the film days our ISO was set for the entire roll of film loaded in our camera and the only way to adjust it would be to replace it with a different roll of film with a different ISO rating. Digital has changed that by allowing the photographer to change the ISO at any time. The problem with increasing ISO settings is that higher ISOs introduce noise into our images that reduces the overall quality of the image. Lower ISOs while delivering less noise and higher quality images may prevent us from capturing an image in the way we want to because there may not be enough light captured to give us a proper exposure. What is noise? In film and in digital photography, noise appears as graininess due to the capture of a different exposure or color in grains or pixels as opposed to the surrounding grains or pixels making it standout. As we increase our ISO it increases the occurrences of noise. As photographers we must find a balance between quality and noise that conveys the scene as we desire. As a general rule, we should always aim to use the lowest possible ISO if we want the highest possible quality. As a standard, this is generally around ISO 100. While there are films and digital sensors with lower ISO settings the quality of the images is not significantly better to warrant going much lower than this standard. The main reason for going lower than the standard would be because you desire to use a slower shutter speed or wider aperture than the standard allows. And, the obvious reason for increasing your ISO above this standard would be that it does not let in enough light to get a proper exposure at the shutter and aperture setting you desire to use. If we relate ISO to stops than a 100 ISO setting is half as sensitive as a 200 ISO setting or we could say a 200 ISO setting is twice as sensitive as a 100 ISO setting. If we move from 100 to 200 ISO we have doubled the amount of light being recorded or increased exposure by one stop. Or, if we move from 100 to 400 ISO we have increase exposure by 2 stops, and so on. Conversely, if we move from 400 ISO to 100 ISO we have decreased the exposure by 2 stops. In photography, stops are the common language of describing the intensity of exposure adjustments.
In my next post I will discuss the second exposure control, aperture. I want to hear from you, please leave your comments, questions or topic suggestion for future blogs in the comments section.
Thursday, June 16, 2011
15% Off Nik Software Discount Code - GCLURE

Mt. Whitney, converted to Black & White with Nik Silver Efex Pro 2
© Greg Clure Photography
Elements of Exposure - Part I
In my last Elements of Photography entries, I discusses Elements of Composition in a two part series. In this upcoming multi-part series I will cover the basics of exposure entitled Elements of Exposure. In Part I, I will introduce this element and in the successive parts I will discuss the key elements that a photographer uses to control exposure before shifting topics to dynamic range and how we control this important element as part of the exposure process.
The Exposure Triangle
Getting your exposure right is the fundamental skill every photographer must master in order to progress. Exposure or proper exposure is the right amount of light being recorded to convey the photographer’s intent with the greatest amount of detail in the image. In photography, we measure that light in Exposure Values or commonly referred to as stops or f-stops. A stop is a doubling or halving in the amount of light. The standard camera has three ways of doubling or cutting in half the amount of light so that the proper amount of light hits the recording medium. ISO, aperture and shutter are the three controls a photographer has to affect exposure.

If you think about a triangle, we can place the exposure controls at each corner of that triangle. At the top is our ISO setting or the sensitivity of the film or sensor to the light. At the bottom two corners are the aperture, the size of the opening in the lens that the light must pass through and the shutter speed, how long the curtain in front of the recording medium is left open to the light. Our mission is to adjust each of these controls in concert to produce an image that is properly exposed with the artistic effects we desire. And it is the later part of this exposure equation that separates the professionals from the amateurs. While all modern cameras can set all three of these controls for you, it is only when you take your camera off fully-automatic mode can you dial in the appropriate setting to achieve the affect you in vision and retain proper exposure. What is proper exposure? In most cases the proper exposure combines these three setting to produce an image with details visible from the darkest shadows to the brightest highlights with the least amount of pure blacks or pure whites that the camera will allow. The proper exposure is illustrated as the dead center in the above exposure triangle. However, at times our camera may not be capable of recording the entire range of light form the brightest whites to the darkest blacks. Better known as dynamic range, the ability to capture this range by our cameras is limited. The human eye is capable of seeing a much wider dynamic range than a camera is capable of capturing. The eye can easily distinguish a dozen or more stop differences in a scene where a good DSLR camera is only capable of recording half as many and most point and shoot camera are even more limited.
Let us first review the exposure controls and how they affect our images and how we can control them to introduce certain characteristics to our images and then we will look at some techniques that allow us to reduce the dynamic range in a scene or different techniques we can use to capture a greater dynamic range.
In the next part I will cover the first of these controls, ISO. I want to hear from you, please leave your comments, questions or topic suggestion for future blogs in the comments section.
The Exposure Triangle
Getting your exposure right is the fundamental skill every photographer must master in order to progress. Exposure or proper exposure is the right amount of light being recorded to convey the photographer’s intent with the greatest amount of detail in the image. In photography, we measure that light in Exposure Values or commonly referred to as stops or f-stops. A stop is a doubling or halving in the amount of light. The standard camera has three ways of doubling or cutting in half the amount of light so that the proper amount of light hits the recording medium. ISO, aperture and shutter are the three controls a photographer has to affect exposure.

If you think about a triangle, we can place the exposure controls at each corner of that triangle. At the top is our ISO setting or the sensitivity of the film or sensor to the light. At the bottom two corners are the aperture, the size of the opening in the lens that the light must pass through and the shutter speed, how long the curtain in front of the recording medium is left open to the light. Our mission is to adjust each of these controls in concert to produce an image that is properly exposed with the artistic effects we desire. And it is the later part of this exposure equation that separates the professionals from the amateurs. While all modern cameras can set all three of these controls for you, it is only when you take your camera off fully-automatic mode can you dial in the appropriate setting to achieve the affect you in vision and retain proper exposure. What is proper exposure? In most cases the proper exposure combines these three setting to produce an image with details visible from the darkest shadows to the brightest highlights with the least amount of pure blacks or pure whites that the camera will allow. The proper exposure is illustrated as the dead center in the above exposure triangle. However, at times our camera may not be capable of recording the entire range of light form the brightest whites to the darkest blacks. Better known as dynamic range, the ability to capture this range by our cameras is limited. The human eye is capable of seeing a much wider dynamic range than a camera is capable of capturing. The eye can easily distinguish a dozen or more stop differences in a scene where a good DSLR camera is only capable of recording half as many and most point and shoot camera are even more limited.
Let us first review the exposure controls and how they affect our images and how we can control them to introduce certain characteristics to our images and then we will look at some techniques that allow us to reduce the dynamic range in a scene or different techniques we can use to capture a greater dynamic range.
In the next part I will cover the first of these controls, ISO. I want to hear from you, please leave your comments, questions or topic suggestion for future blogs in the comments section.
Tuesday, June 7, 2011
From the Edge with Peter Lik Photo Contest Winner
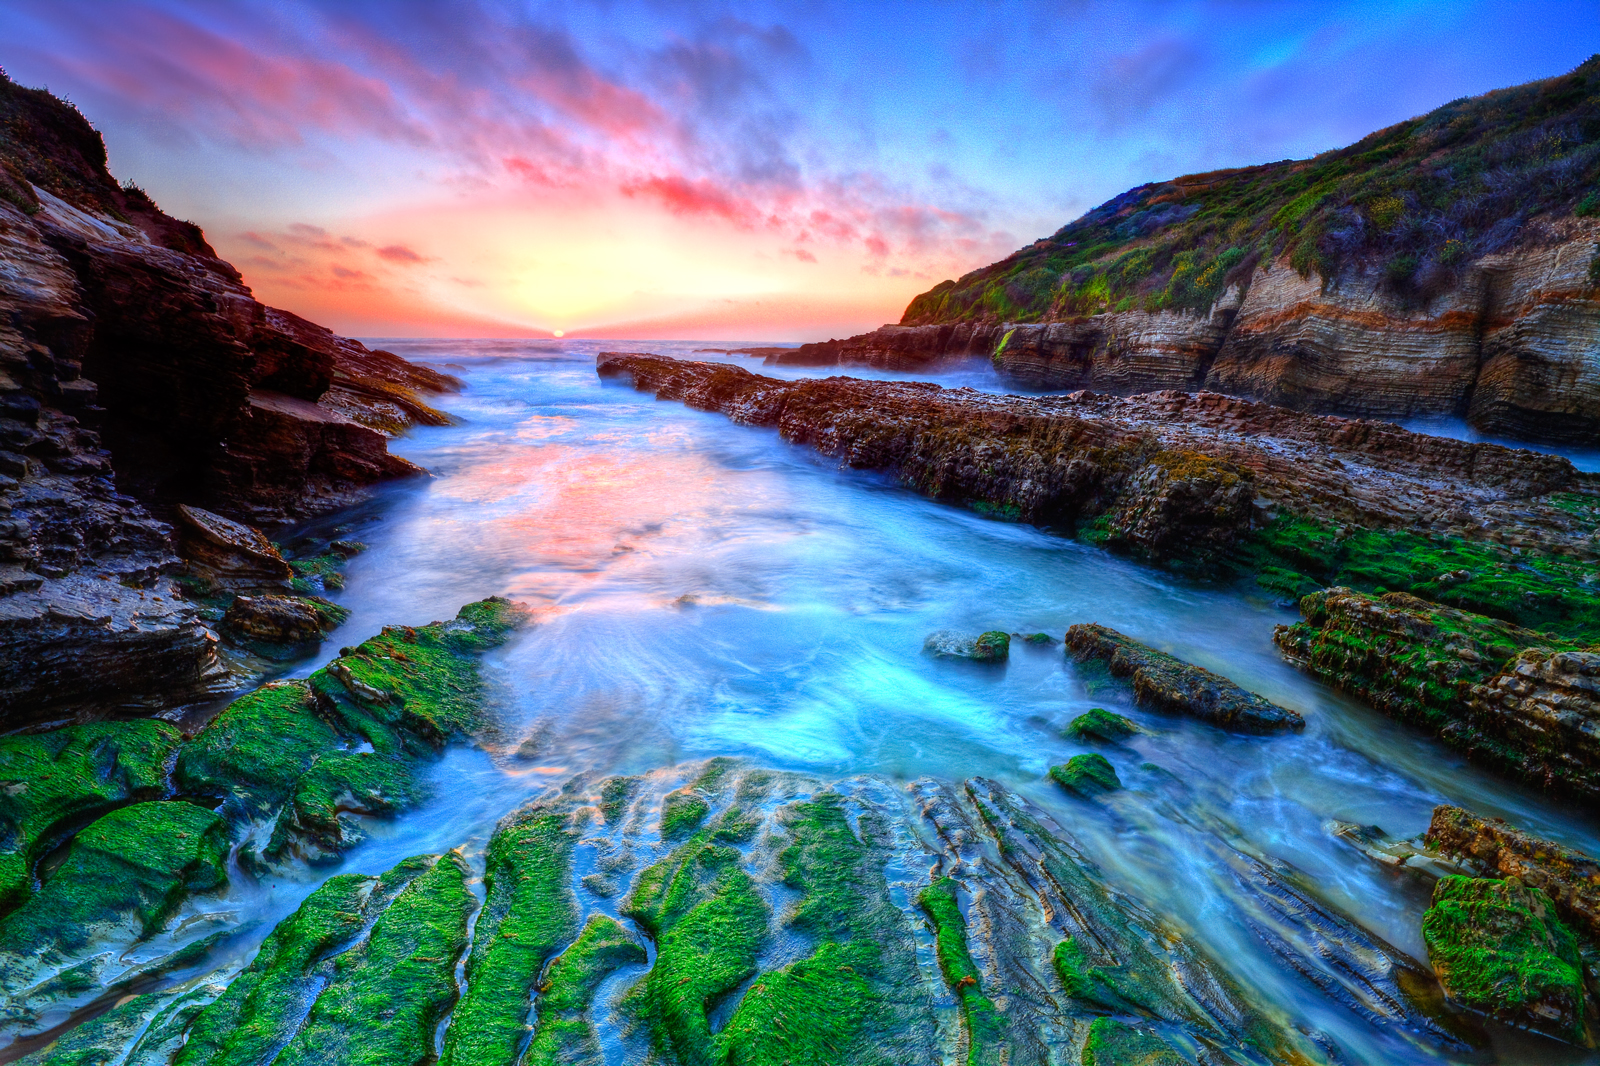
© Greg Clure Photography
This image is also my featured image of the month and all Registered users can receive a 20% discount on this image during the month of June 2011. Not a register user? Simply click on the Register button in menu of my website, fill out the form, and you will start receiving monthly discount offers, news and updates from Greg Clure Photography.
Sunday, June 5, 2011
Photo Tours Launched by Greg Clure Photography

Announcing the launch of my Fall 2011 Photo Tours. My Photography Tours emphasize in the field landscape and wildlife image capture in unique locations at prime times of the year. I have made numerous trips to these destinations over the past 25 years. My knowledge of these areas combined with my photography credentials and experience means everyone from novice to expert will get something out of every photo tour. Read more about a specific Photo Tour by clicking on that Tour below:
- Eastern Sierra Fall Spectacular Photo Tour - October 5-9, 2011
- Zion's Subway & Fall Foliage Photo Tour - November 2-4, 2011
- Zion's Virgin River Narrows Photo Tour - November 5, 2011
- Death Valley in December Photo Tour -December 4-10, 2011
- Santa Monica Mountains Coastal Sunset Photo Tour - November 12 or December 11, 2011
Subscribe to:
Posts (Atom)